Quick Answer
To repair torn roof felt under tiles, you need to first assess the damage from your loft. For small tears, clean the area around the damage, cut a patch of matching felt that overlaps by at least 100mm, apply bitumen adhesive or roofing mastic to create a watertight seal, and press the patch firmly in place. For larger tears or badly deteriorated felt, you'll need to remove tiles and battens to access the damaged section from outside and install a new piece of membrane. Minor repairs can often be done from inside the loft, but extensive damage typically requires professional help and may need a full replacement rather than patching. Knowing how to repair torn roof felt under tiles is essential before attempting any work.
Understanding What Roof Felt Does and Why It Tears
Roof felt, sometimes called sarking felt, sits between your tiles and the timber structure underneath. We see it as a protective membrane that stops water getting through if tiles crack or slip, and it also helps keep wind-driven rain out of your loft.
Traditional bitumen felts were installed in thousands of UK homes decades ago, and much of this material is now reaching the point where small tears and brittleness start to appear. Older felt installed before modern breathable membranes became popular was never designed to last the full lifespan of the tiles above it, which is why repairs beneath otherwise good roofs are increasingly common.
The main difference between old and new types comes down to how they handle moisture. Newer breathable membrane allows water vapour to escape from your loft, while older bitumen versions don't let moisture through at all. This means condensation in poorly ventilated lofts can soften older felt and make it more prone to tearing.
Common Causes of Felt Damage in UK Homes
Strong winds during UK storms can lift tiles slightly, allowing gusts to ripple the felt underneath and gradually weaken it over time. We've found that freeze and thaw cycles are a major contributor to felt deterioration, especially on north-facing roofs where moisture sits longer.
Many homeowners don't realise roof felt exists until they see it sagging in the loft or notice dust and debris falling through small splits. In properties built between the 1960s and early 1990s, the original felt has already outlived its expected service life, even if the roof covering looks fine externally.
Minor felt tears are sometimes caused by ageing battens or nails working loose rather than direct weather damage. Roofing professionals across the UK often describe torn felt as one of the most overlooked causes of minor loft damp rather than major tile failure.
Signs You Need to Repair Torn Roof Felt
Loft inspections in the UK frequently reveal daylight showing through gaps in felt long before rainwater starts entering the property. If you suspect there's a problem, head up to your attic with a torch and look for these warning signs.
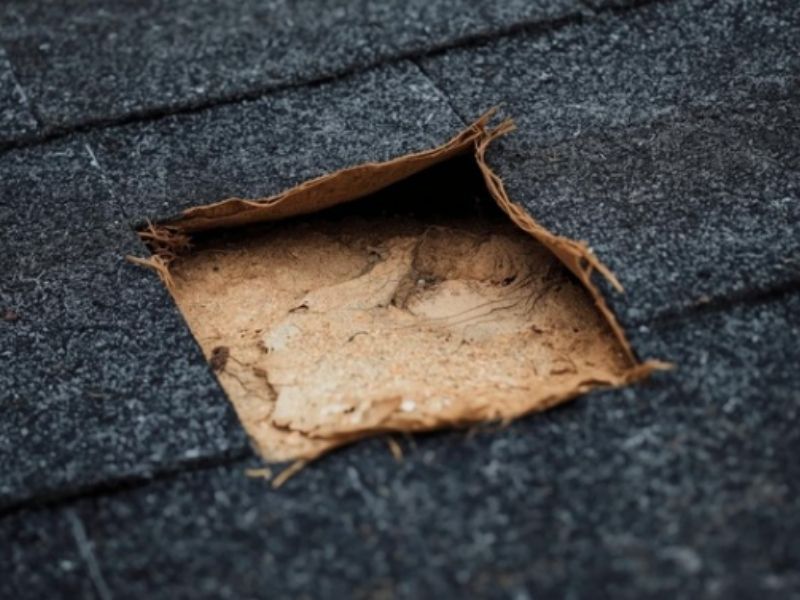
Water marks on your insulation might indicate that the roof tiles above need replacing, not just the felt. However, if you can track the source of dampness and see a rip or hole in the membrane itself, that's a clear sign of felt damage.
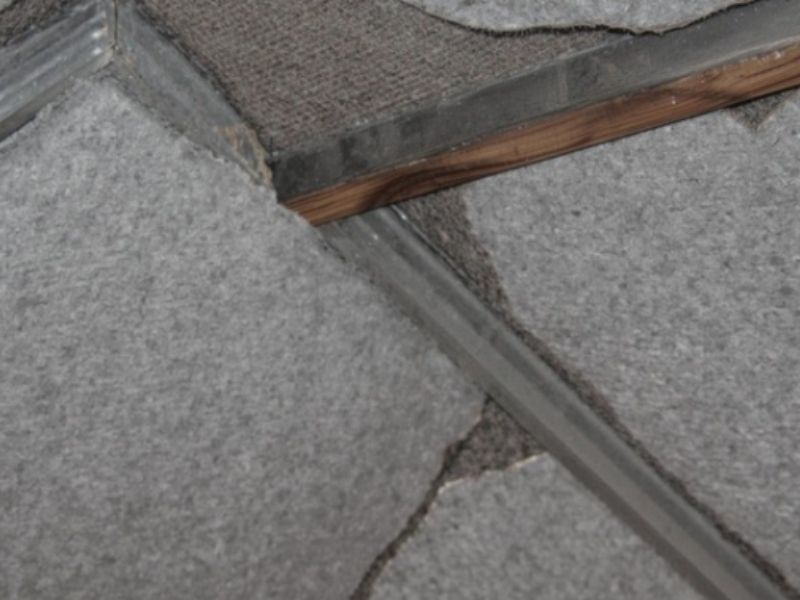
You might also spot exposed rafters where the felt has pulled away from the battens, or notice small holes where the material has become brittle and cracked. Some people see dust falling through splits in the felt, or find that rain is getting in even though there are no missing tiles on the outside.
When Patching Makes Sense and When It Doesn't
Small, isolated tears in roof felt can often be patched without needing a full felt roof replacement. DIY repairs make sense for neat, shallow tears where you can easily access the damage from inside your loft. At Checkaroof, we tend to recommend patching when the tear is less than 200mm long and the surrounding felt is still in good condition.
Widespread damage to roof felt typically requires a full replacement rather than patching. If the felt is over 40 years old and shows signs of brittleness across multiple areas, or if you can see daylight through numerous gaps, patching won't give you a lasting fix.
A competent roofer should assess the condition of the felt internally and advise if it is possible to repair or if the full roof felt needs replacing. Estate agents often mention damaged underlay in surveys because it can signal hidden moisture issues, even when there are no visible leaks indoors.
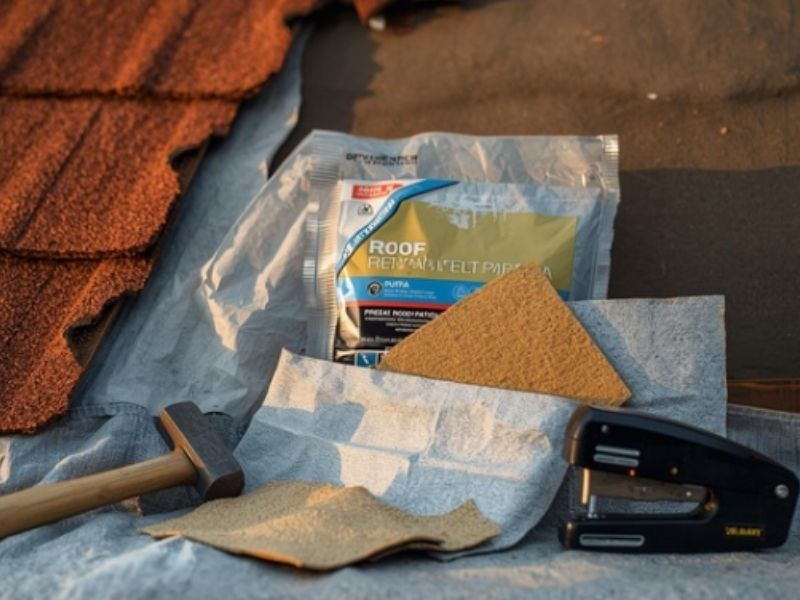
Materials You Need for Repairing Torn Roof Felt
Before you start any repair work, gather the right materials. Using dedicated roofing repair tapes or patches is necessary for a proper seal that will protect your loft from water ingress.
For traditional bitumen felt repairs, you'll need bitumen adhesive or cold-applied mastic, along with a patch of matching felt. Patching a breathable membrane requires different adhesives, and cold-applied mastic is often suitable for this type of repair.
You'll also want roof and gutter sealant to seal all the edges of your patch firmly in place. A heat gun is recommended instead of open flames for heating bitumen in a loft due to fire hazards. Other useful items include a stiff brush for cleaning, a utility knife for cutting patches, roofing nails or staples to stick the patch down, and protective gloves.
The cost of DIY materials for patching minor felt tears ranges from £12 to £25. At Checkaroof, we always suggest buying slightly more material than you think you'll need, as it's better to have extra than to run out halfway through the job.
Safety Equipment You Shouldn't Skip
Safety precautions include setting up scaffolding or using a safety harness and roof ladder for accessing work at height. Even if you're working from inside the loft, you need a stable ladder to reach the damaged area safely.
Wear dust protection when working in confined spaces, as old insulation and deteriorated felt can release particles that irritate your lungs. Make sure you have good ventilation in the attic while you work, and consider wearing knee pads if you'll be kneeling on joists for extended periods.
How to Patch Torn Roof Felt From Inside Your Loft
For minor tears that do not require tile removal, a patch can be applied from within the loft space. This is the simplest approach and works well when the damage is small and you can reach it without having to strip tiles from outside.
Start by cleaning the area around the tear. The application of adhesive requires the area to be clean and dry, as wet surfaces prevent proper bonding. Use a stiff brush to remove any dust, cobwebs, or loose bits of old felt.
Cut a patch that's large enough to overlap the existing felt by at least 100mm on all sides. This overlap ensures proper water runoff and creates a watertight seal. If you're working with bitumen felt, you can use bitumen adhesive. For breathable membrane, check the manufacturer's instructions as some need specific products.
Applying the Patch and Creating a Watertight Seal
Spread your adhesive evenly over the damaged area and slightly beyond where the patch will sit. Then press your patch into place, starting from one edge and working across to avoid trapping air bubbles. Air bubbles should be avoided when pressing a patch over adhesive to ensure a secure seal.
Once the patch is down, use roofing nails or staples around the edges to hold it firmly while the adhesive sets. Then apply a bead of roof sealant around all edges of the patch to create an extra barrier against moisture.
Proper installation of a felt patch requires securing it with roofing nails or staples and ensuring a watertight seal with sealant around all edges. We recommend leaving the repair to cure for at least 24 hours before putting insulation back over it.
If you have carried out a patch repair in the loft, there are measures you can take to help prevent further damage. Improving loft ventilation can stop condensation building up, which is one of the main reasons old felt becomes brittle and tears in the first place.
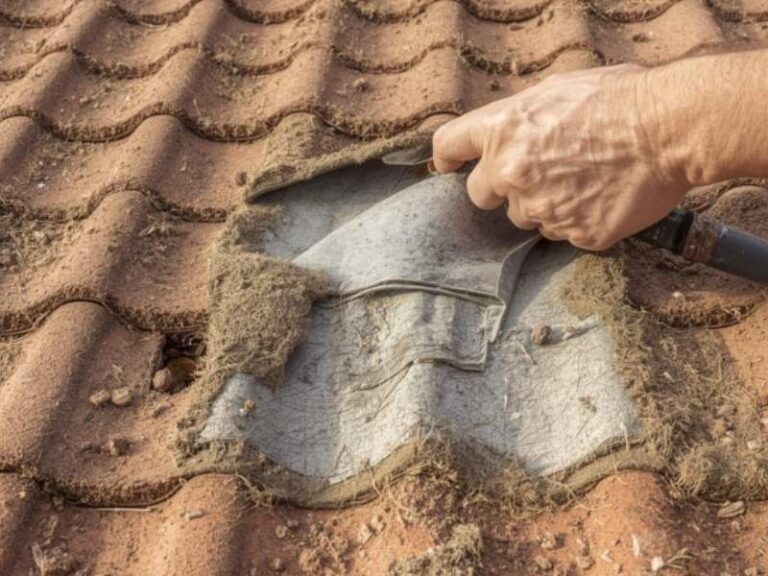
Repairing Torn Roof Felt By Removing Tiles
For a more permanent repair, tiles and battens must be removed to access the damaged felt and install a proper new section. This approach gives you much better access to the tear and lets you replace the felt properly rather than just covering it up.
Removing tiles for repair requires identifying the damage and removing 3 tiles per course in a small section surrounding the rip. Work carefully to avoid breaking sound tiles, and keep track of any nails or clips you remove so you can put everything back together correctly.
Once the tiles are off, you'll usually need to lift or remove the battens that hold them in place. This exposes the full extent of the damage and lets you see if the timbers underneath need attention too. Sometimes you'll find that the rafters or battens have wood rot, which means you need to fix that before replacing the felt.
Installing New Felt and Putting the Roof Back Together
Cut a new section of felt that's large enough to overlap the old material by at least 100mm. New felt should overlap the existing felt by at least 100mm to ensure proper water runoff. Position it carefully, making sure it's attached firmly to the rafters or existing battens.
Use roofing nails or staples to fix the new section in place, working from the top down so that each layer overlaps the one below it. This way, water will always run down and off the roof rather than getting under the edges.
Once the felt is secured, refit the battens and then carefully put the tiles back. Make sure each tile sits properly and is attached firmly to avoid problems down the line. Check that the eaves are covered and that the felt extends far enough to direct water into the gutter.
When to Call a Professional Roofer Instead of DIY
DIY repairs are suitable for small, neat, and shallow tears in roof felt. However, professional help is necessary for complex or risky roof felt repairs. At Checkaroof, we get called out regularly for situations where homeowners have tried to fix the problem themselves but found it was bigger than expected.
Signs that indicate the need for professional help include wood rot or extensive damage to the felt. If the felt is sagging badly across a large area, or if you can see multiple tears and splits, patching won't solve the underlying issue.
Hiring a professional to patch felt can cost between £80 and £200, depending on access and the extent of the damage. A large number of felt roof repairs are discovered during unrelated work such as tile replacement, loft conversions or solar panel installations, which is when many roofers will spot problems that homeowners didn't know existed.
Understanding the Cost of Full Replacement
The average cost for a full re-felt on a three-bedroom semi-detached house ranges from £1,800 to £4,500. For repeated issues, investing in a full re-felt proves cheaper in the long run than constantly patching small tears.
Some homeowners opt for small patch repairs where access is limited, while others take the opportunity to upgrade sections to modern breathable membrane for better airflow. Replacing a small section of felt during a tile repair can extend the overall roof lifespan without the cost of a full reroof.
Many UK roofers say torn felt is rarely noticed from outside, meaning problems can develop slowly over years before becoming obvious. This is why we always recommend getting a proper inspection if you've got an older roof, even if everything looks fine from ground level.
Why Breathable Membrane Is Worth Considering
As energy efficiency upgrades become more popular, improving underlay ventilation is becoming part of routine roof maintenance rather than a specialist job. Modern breathable membranes allow moisture to escape from your loft while still keeping wind and rain out.
Many UK roofs built before breathable membranes rely heavily on intact felt as a secondary barrier against wind-driven rain. If that barrier fails, you can get damp problems even when the tiles themselves are fine. Switching to breathable membrane when you repair or replace felt gives you better long-term protection.
Some homeowners only discover torn felt after installing new insulation, as improved thermal performance highlights existing moisture problems. If you're planning to upgrade your loft insulation, it makes sense to check the condition of your felt at the same time and fix any issues before they get worse.
Long-Term Benefits of Upgrading Your Roof Felt
Newer types of roof felt are breathable, allowing moisture to escape the loft, while older types are not. This means better ventilation, less condensation, and a lower chance of rot developing in your timbers over time.
Older bitumen membranes typically have a life expectancy of approximately 30 years, depending on weather conditions and ventilation. If your felt is approaching or past this age, upgrading to a breathable membrane during repairs can add decades to your roof's working life.
At Checkaroof, we've seen how much difference good ventilation makes. Homes with breathable membrane tend to have fewer problems with damp insulation, and the loft stays in better condition overall.
Common Mistakes to Avoid When Repairing Roof Felt
One mistake people make is trying to patch wet felt. You need a completely dry surface for adhesive to bond properly, so wait for dry weather and give the area time to dry out before you start work.
Another issue is using the wrong type of adhesive. Traditional bitumen felts need bitumen-based products, while breathable membranes often need different mastic. Check what you've got before you buy your materials.
Don't cut your patch too small. If it doesn't overlap by at least 100mm, water can still get through at the edges. We've seen plenty of repairs fail because the patch was only just big enough to cover the hole itself.
Getting the Overlap and Seal Right
Make sure you press the patch down firmly to avoid air bubbles. Any gaps between the adhesive and the felt will let moisture in, and the whole repair can fail surprisingly quickly.
Seal the edges properly with roofing mastic or tape. Even if the main patch is stuck down well, water can creep in around the sides if you don't finish the job properly. Take your time with this step and make sure every edge is covered.
Finally, don't assume a patch will last forever. Patching roof felt from inside the loft may only provide a temporary solution, especially if the surrounding felt is old and brittle. Keep an eye on the repair and be ready to consider a full replacement if problems keep coming back.
What to Do If Your Felt Is Too Damaged to Patch
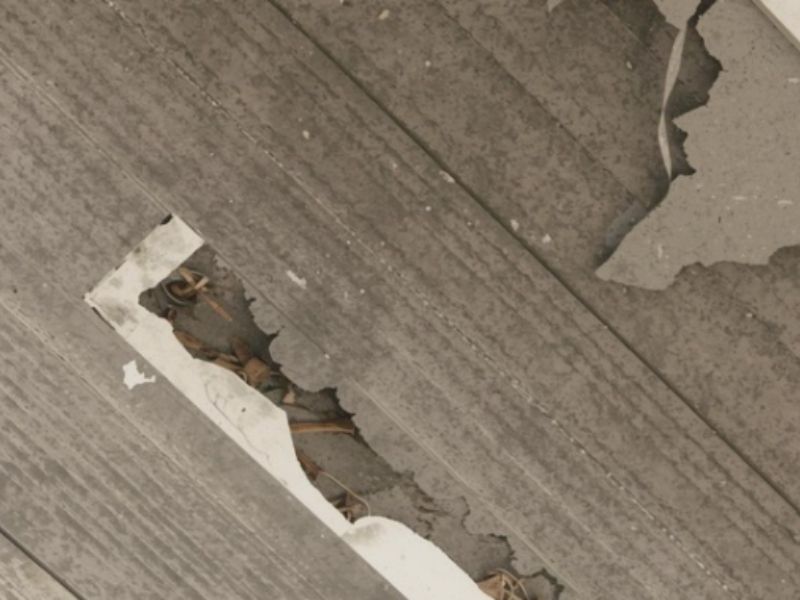
If the felt membrane has perished, it may eventually need to be replaced to prevent water ingress. Severely deteriorated felt, especially material that's over 40 years old, may necessitate a full roof replacement instead of patching.
Homeowners often assume broken tiles are the main cause of leaks, but underlay failure is a surprisingly common underlying factor. If you've got widespread brittleness, multiple tears, or large sections where the felt has pulled away completely, patching each individual problem won't give you a reliable roof.
A competent roofer will assess the condition of the felt before deciding on repairs or replacement. They'll look at how much of the felt is damaged, whether the timbers are sound, and what type of membrane you currently have.
Making the Decision Between Repair and Replacement
Repair decisions are often influenced by access and roof pitch, as partial tile removal may be needed to reach the damaged section safely. If your roof is steep or hard to work on, the cost of access equipment can make a full replacement more attractive than lots of small repairs.
If roof felt is perished but not leaking, it can be left for a time, but it will eventually need replacement. We tend to advise planning for replacement sooner rather than later, because waiting until water is actively coming in can lead to damage to insulation, timbers, and even ceilings below.
At Checkaroof, a trusted roofing company, we help homeowners weigh up the money side of things. Sometimes spending a couple of hundred pounds on patches makes sense if the rest of the felt is sound. Other times, investing in a full re-felt is the smarter choice because it sorts the problem out for decades.
Tips for Preventing Future Felt Damage
Once you've repaired your torn roof felt, you want to make sure it lasts. Good loft ventilation is one of the best ways to protect your felt from condensation damage. Make sure your loft has adequate airflow, especially if you've got older bitumen felt that doesn't breathe.
Check your loft regularly for signs of new damage. A quick look every few months can help you spot small problems before they turn into big ones. Look for daylight coming through, sagging sections, or any new tears.
Keep your gutters clear so water drains away properly. Blocked gutters can cause water to back up under the eaves, which puts extra stress on the felt at the edges of your roof. This is particularly important after autumn when leaves tend to build up.
Maintaining Your Roof to Extend Felt Lifespan
If you're having any other roof work done, ask the roofer to check the felt while they're up there. Many UK roofs have felt issues that only become obvious when someone's actually in the loft or has lifted tiles for another reason.
Consider upgrading to a breathable membrane if you're doing any major roof work. Even if you're only replacing a small section of tiles, switching that area to a modern membrane can improve ventilation and reduce the chance of future tears.
Finally, address any leaking tiles or missing slates as soon as you notice them. The longer water gets through, the more chance it has to damage the felt underneath. Quick action on small repairs can save you from much bigger problems down the line.